
Beginner Sourdough Recipe
Ok, I’ll admit it. Sourdough can be very overwhelming and intimidating. But it also so unbelievably rewarding. I hope i can inspire you to love sourdough as much as I do.
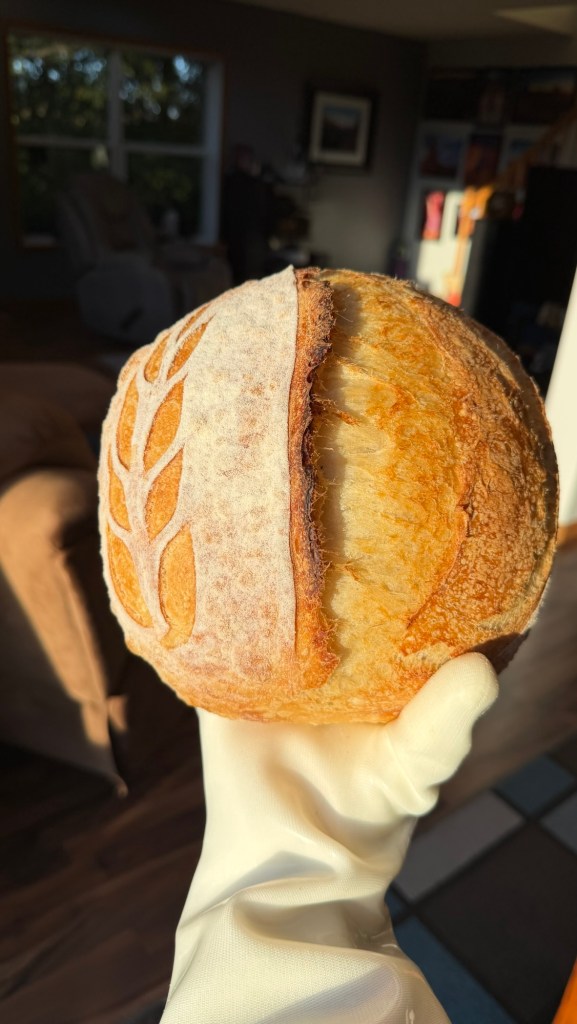
Let’s start with a basic artisan loaf. This is the one with the big belly and if you’re lucky, a big ear. We are going for a light chewy texture with uneven airy holes. All Sourdough tastes amazing, but we are going for aesthetic as well
There are some tools you are going to need. These are not mandatory but are incredibly helpful.
- Glass or ceramic bowl
- Dough wisk
- Bowl scarper
- Bench scraper
- Reusable or disposable bowl covers
- Parchment paper
- Bannetons or a bowl lined with paper towel
- Dutch oven
- Food scale
- Razor blade for scoring
Our recipe is going to be for 2 loaves. I recommend going ahead and making both loaves because it will be great practice and you can always find someone to share the bread with. Sourdough also freezes really well.
Ingredients
- 700g warm 80°- 90°
- 250g active starter Sourdough Starter
- 1000g bread flour (I use King Arthur sir Lancelot)
- 24g salt
So, one thing we will talk about is bulk fermentation. That is basically how long it takes your bread to rise. Always pay attention to what time you initially mix your dough. That is when bulk fermentation starts. It ends when you dump the dough out for shaping. How much time this takes will depend on how strong your starter is and how warm your environment is.
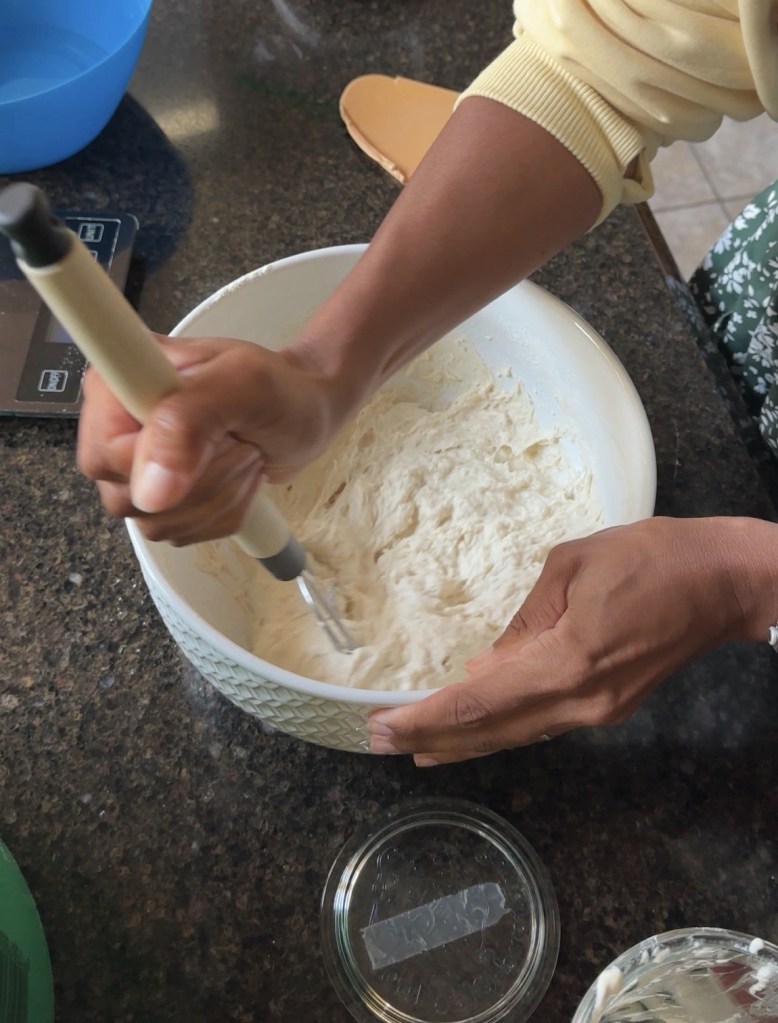
First, you are going to mix the water and starter together with the dough whisk. It will Look like a white milky liquid. To that you will add the flour and salt. With the dough whisk you’ll mix the dough really well. It is important to mix really well at this point. Once you think you’ve mixed it completely, mix a couple more minutes. This part is very labor intensive. You should have a lumpy shaggy dough. Cover the bowl and let it rest 30 minutes
During this time clean your tools, First wipe as much of the dough as you can off the tools with paper towel. This is important because you don’t want to let much of the dough go down the sink.
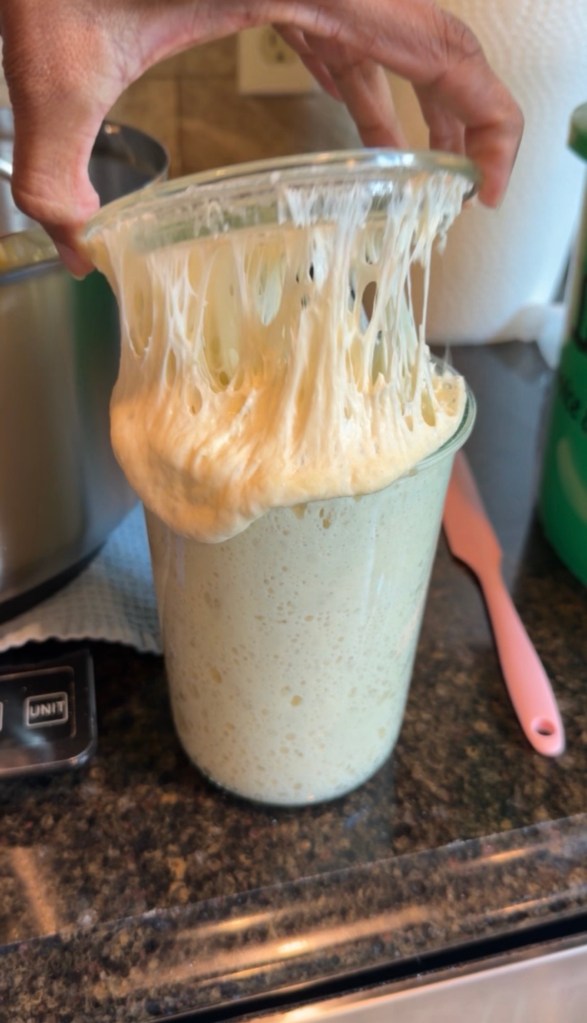
This is also a good time to feed your stater again. Having a strong starter is everything. It should be at least tripling at peak. If it’s only doubling or taking longer than 4 hours to double at room temperature, it’s not ready to make good bread yet. I do sell my very dehydrated starter. You can have it ready to go in 4-5 days. If you are struggling with flat, dense bread or extremely sticky dough you would greatly benefit from purchasing Grow-rilla.
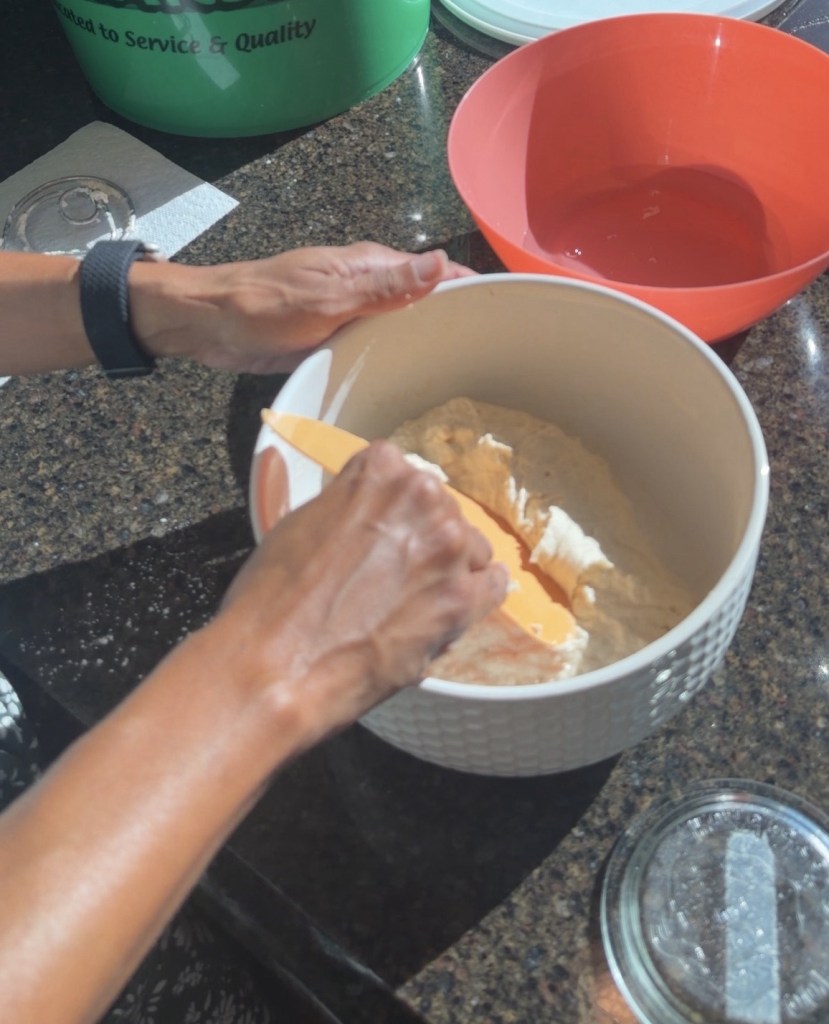
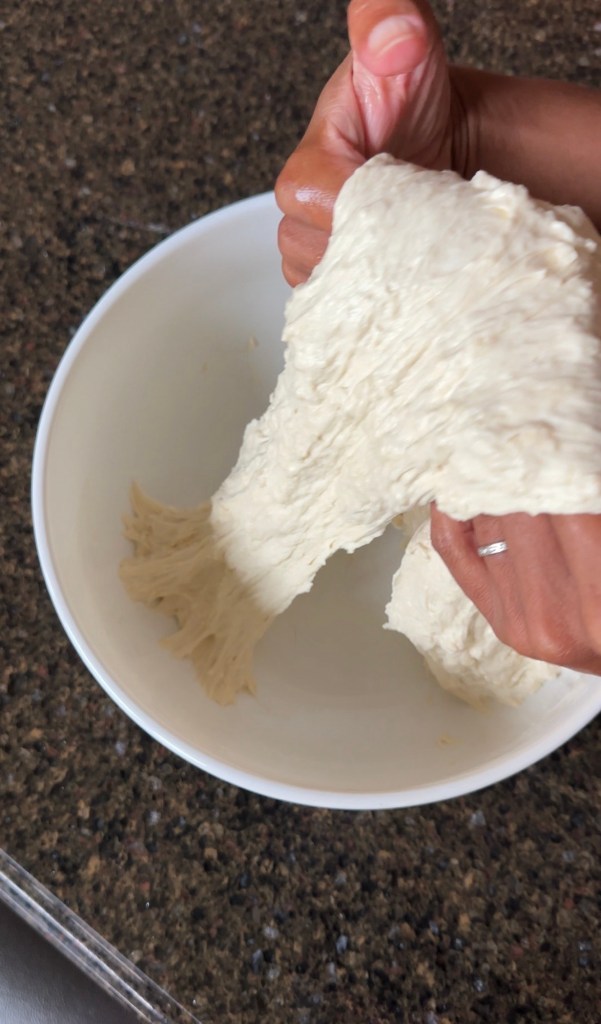
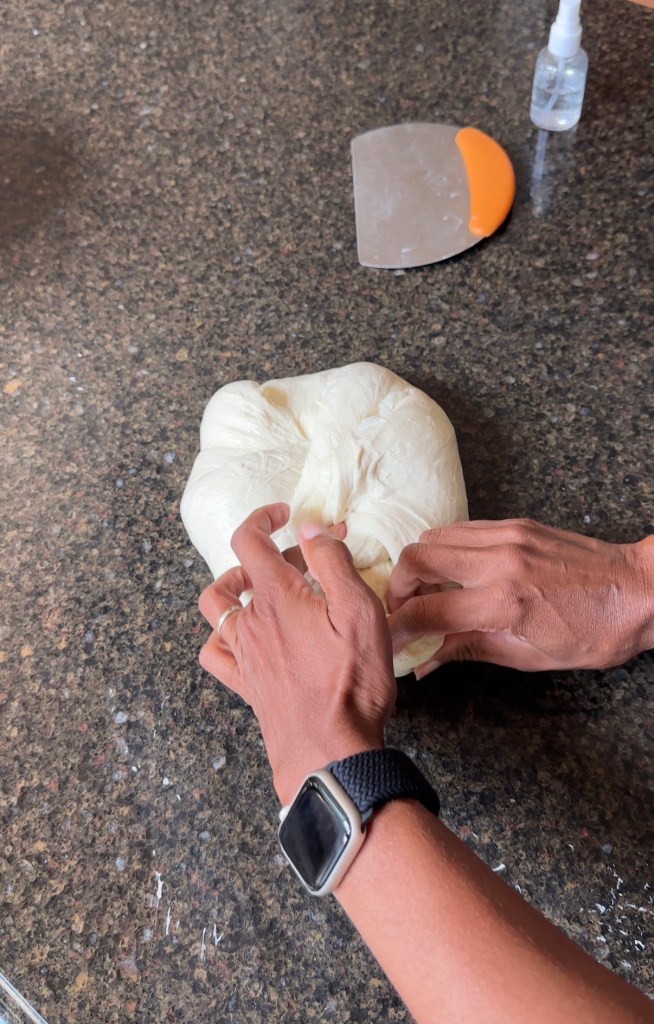
After 30 minutes take your bowl over to the sink. To handle the dough, you need to wet your hands. With both hands you are going to lift the dough up and pull it towards you. This is called a coil fold. Allow the dough to fall onto itself. You may need to wet a bowl scraper to help release the dough from the bowl. Repeat the coil folds 2-3 more times, then turn the bowl and repeat it again. After the coil folds the dough should be smoother on the surface and less sticky. Cover the bowl and let the dough rest 30 minutes. Repeat this process every 30 minutes for a total of 4 coil folds.
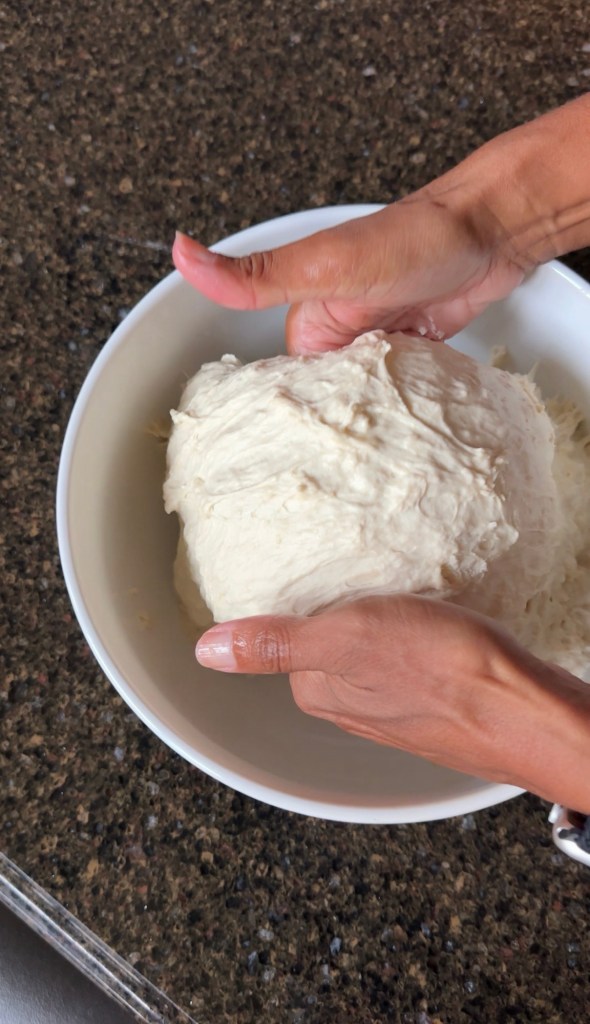


After the 4th coil fold the dough should be retaining its shape more. It should also be less sticky and showing signs of fermentation like bubbles forming on the top.
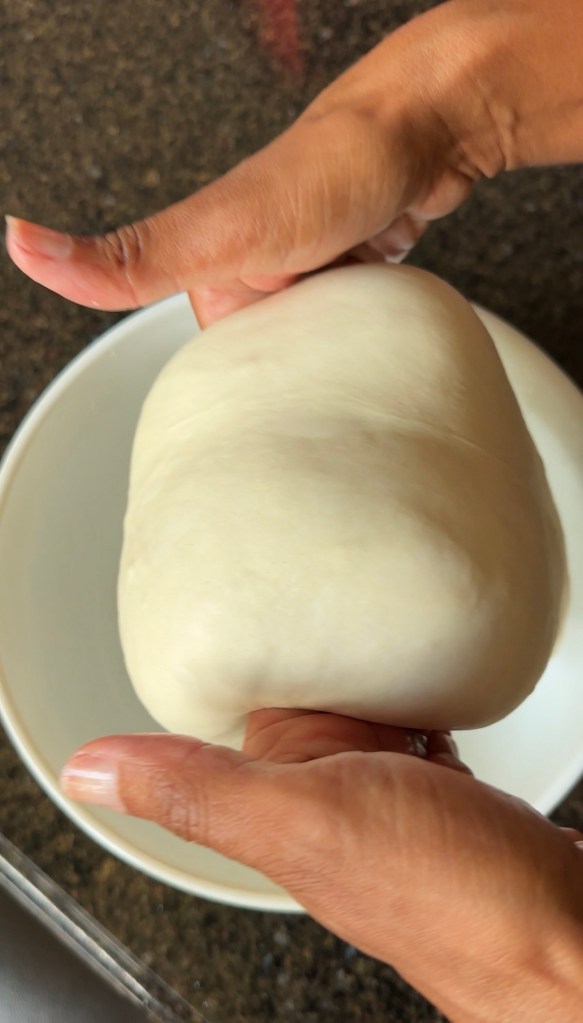
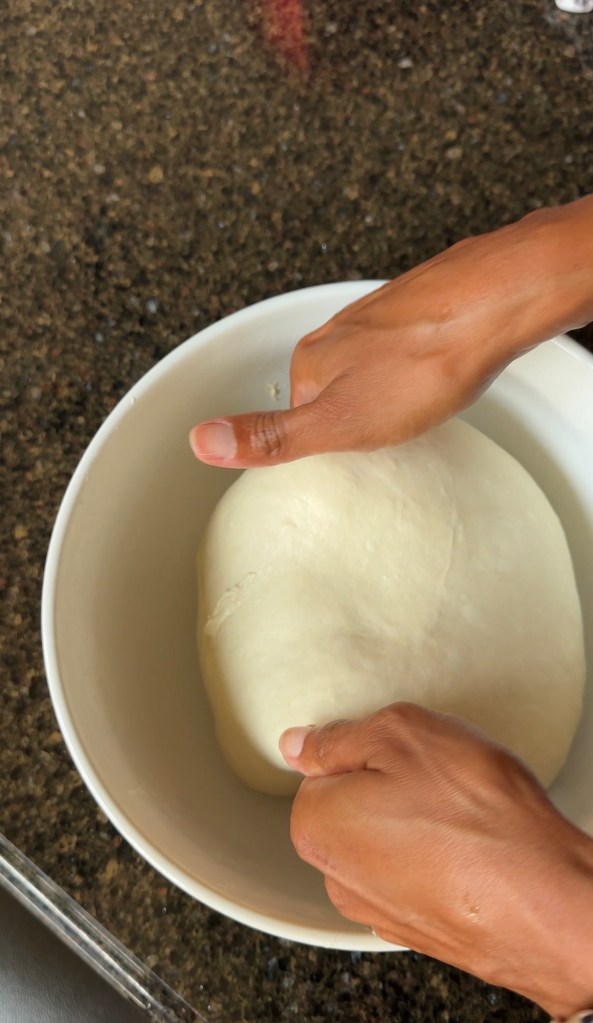
Now comes the tricky part. How do you know if the bread is properly fermented? Like I said earlier it is all dependent on how strong your starter is and how warm the dough is. For me at 75° it’s about 3-5 hours. The signs you are looking for is for the dough to have grown but not quite doubled in size. The top of the dough should have air bubbles and should be domed in appearance. When you shake the bowl, the dough should be quite jiggly.
Something else to consider is when you plan to bake the bread. If you are going to leave it in the fridge for what’s called a cold proof, then take in consideration the dough may continue to rise if it’s bulk fermenting at 75° or higher. That means the dough will continue to grow in the fridge before it cools completely. So, if your dough is warmer than 75° and you want to refrigerate it overnight than you may want to start your shaping after 4 hours. But if your house is quite cool at your bulk fermentation is at 69° and you want to bake the same day, then you might want to start shaping at 6 -7 hours. This is something that gets so much easier as you get more practice.
So, let’s shape!
You’re going to want a small spray bottle to wet your hands. Also wet the countertop and the bench scraper. Be careful though because too much water will cause the dough no to stick to itself. I recommend using water rather than flour especially if you are making bread for someone sensitive to gluten. Adding raw flour will not be long fermented taking away those benefits that make it easier to digest.


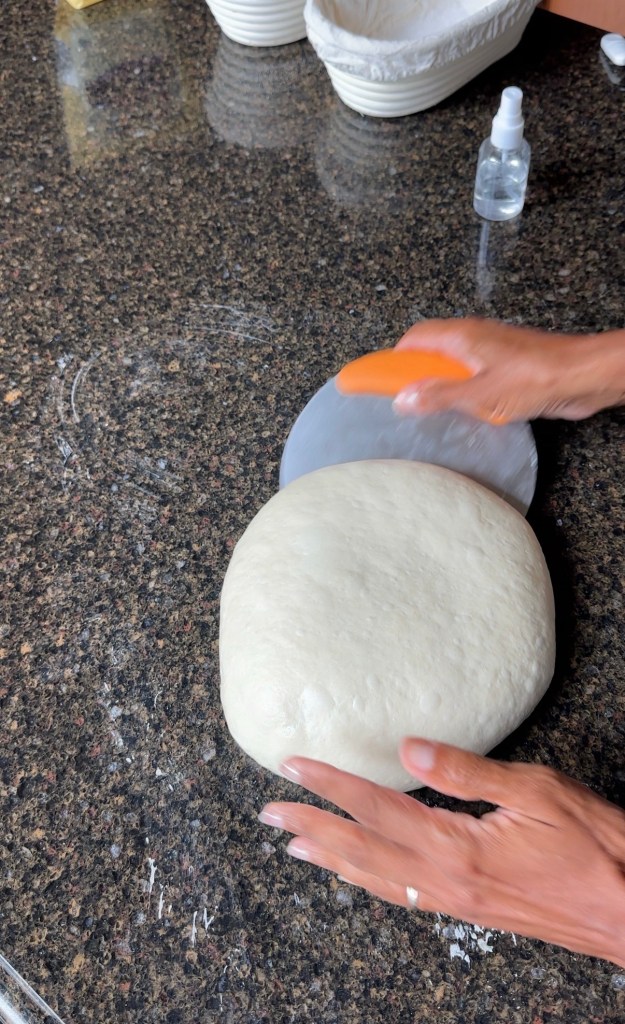
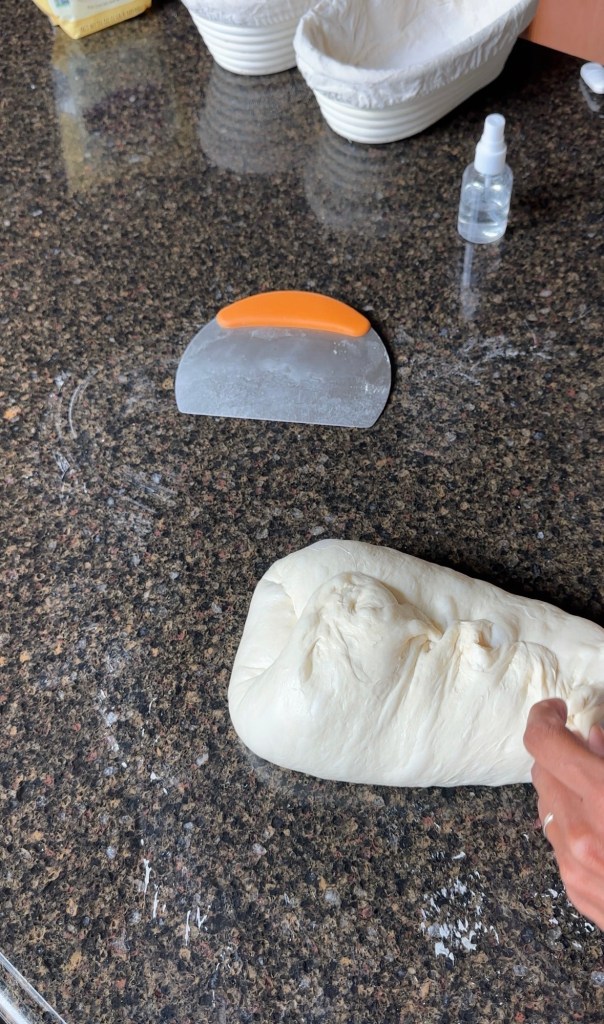
Dump the bowl onto the damp countertop. The top of the dough that is facing up will become the inside of your loaf and the part underneath in contact with the counter will become the surface of your bread. That’s important to remember. Wet your hands and the bench scraper to divide the dough in half. During this time if at any time dough is sticking to your hands or the bench scraper take the time to clean them off.
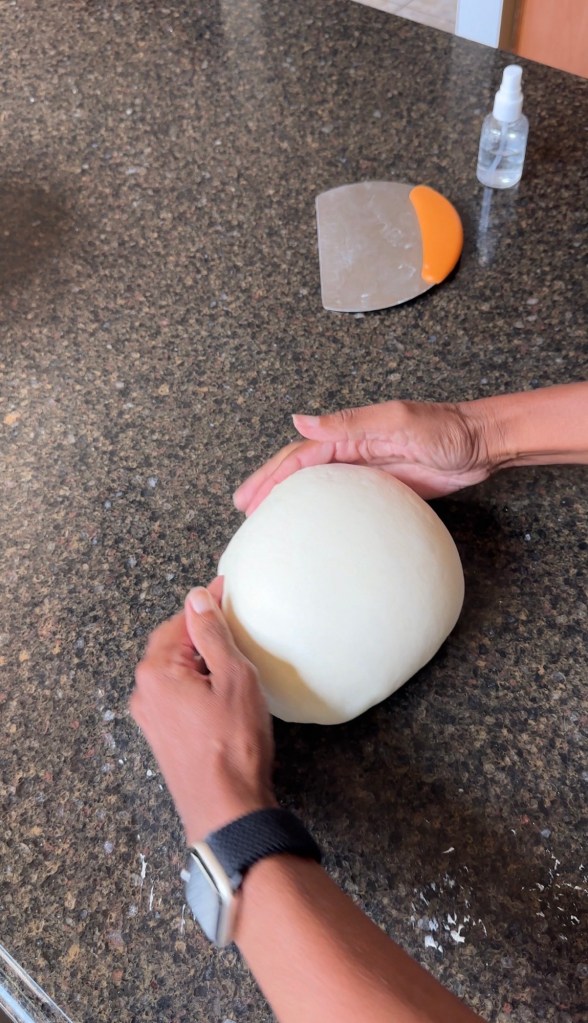
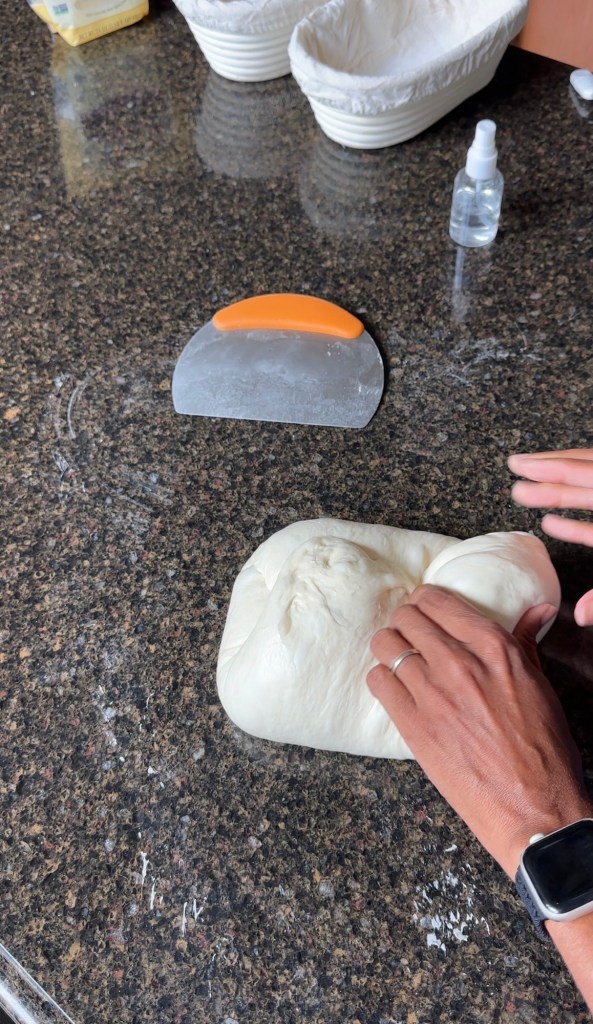
For the first shaping all you are going to do is grab one corner of the dough at a time and bring it to the center, until all for corners are inside and you have a square. Now very swiftly use the bench scarper to flip that dough over. The top should be nice and smooth. Now gently use the tension of the counter to simultaneously turn and drag the dough to you to create a ball. Less is more here and if you are too aggressive the dough will tear and deflate. Repeat the same steps with the other dough portion. Then let them rest for 30 minutes.


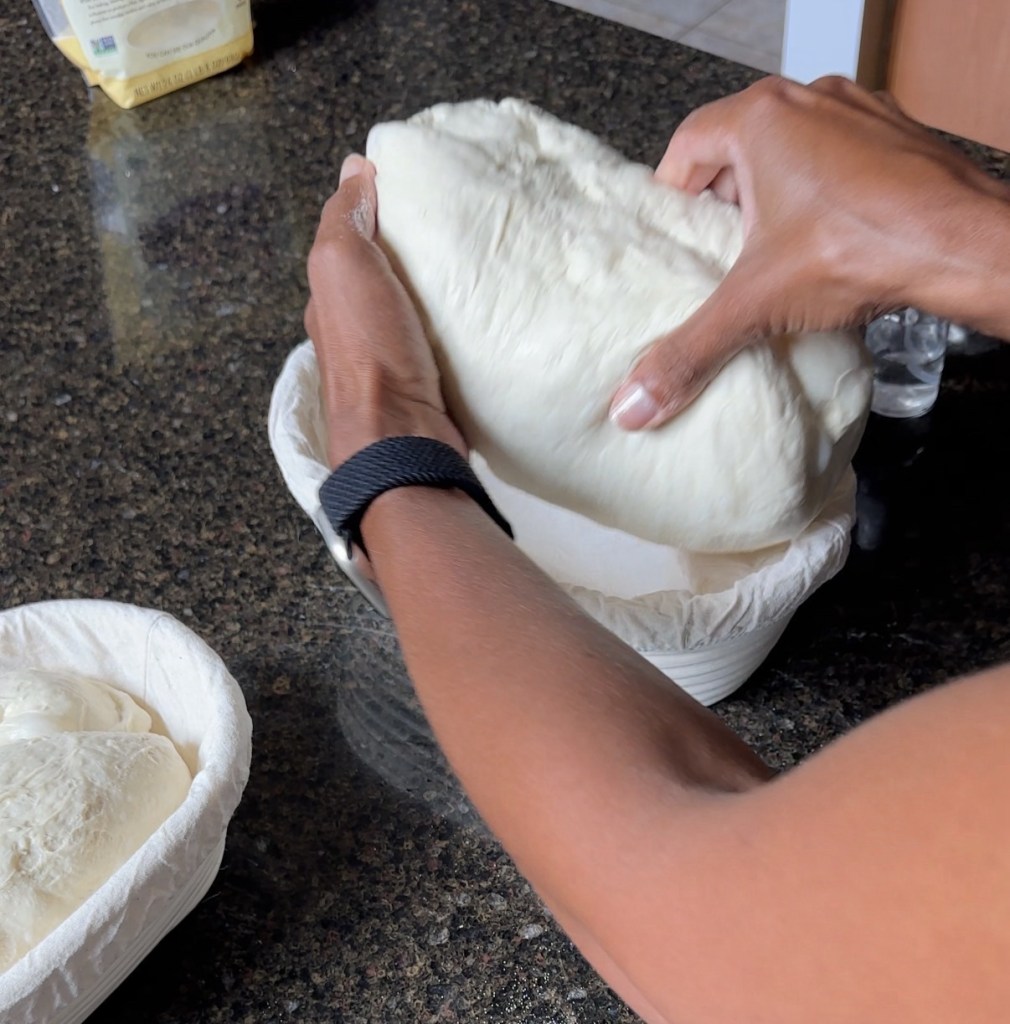
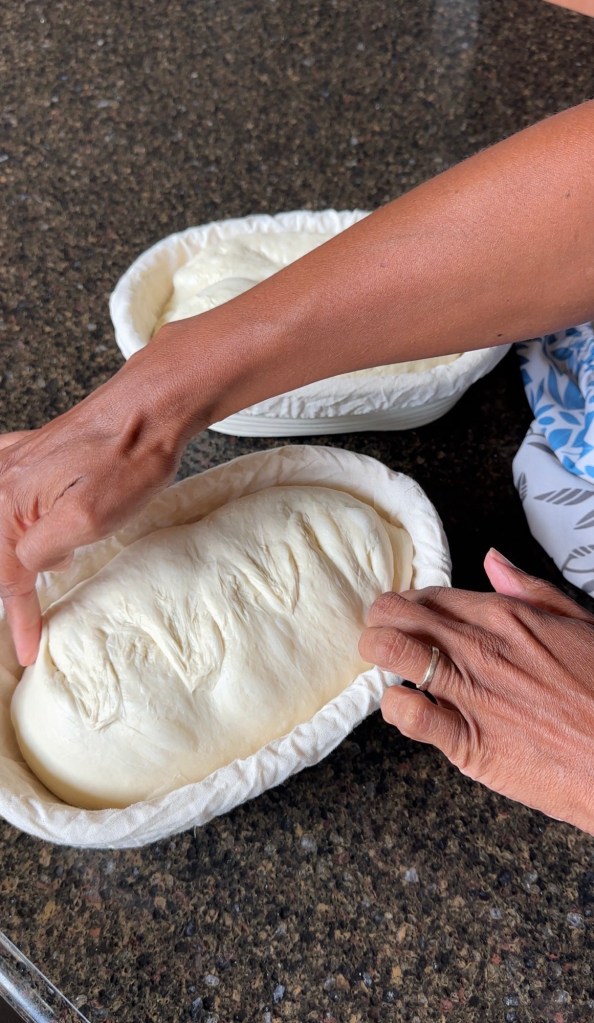
At this time prepare the bannetons. Dust them with rice flour. If you don’t have any that’s ok, it just sticks less because it has no (glue)ten. If you don’t have any bannetons then line a couple bowls with paper towels and dust them with flour.
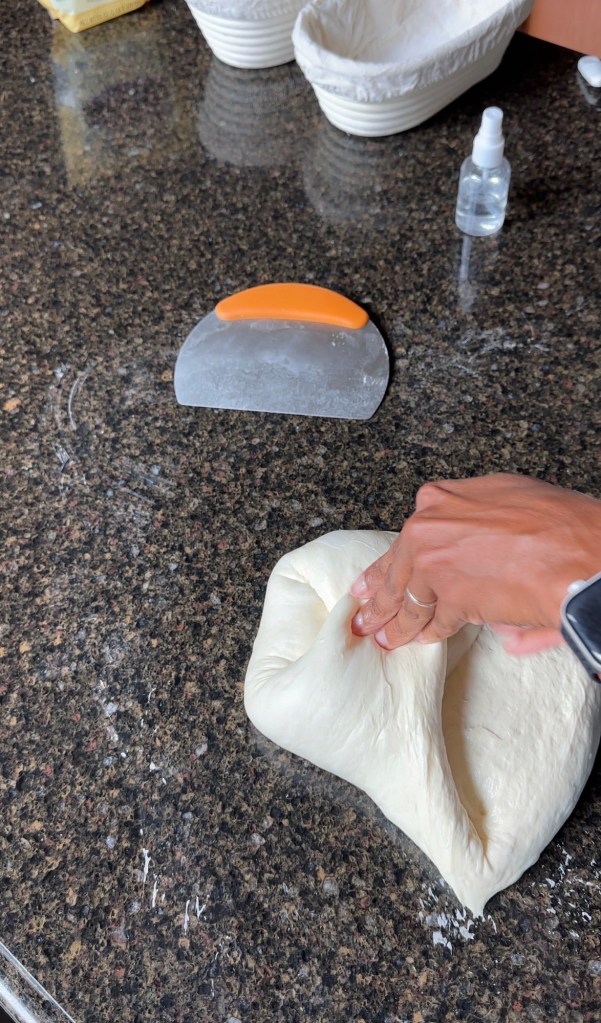
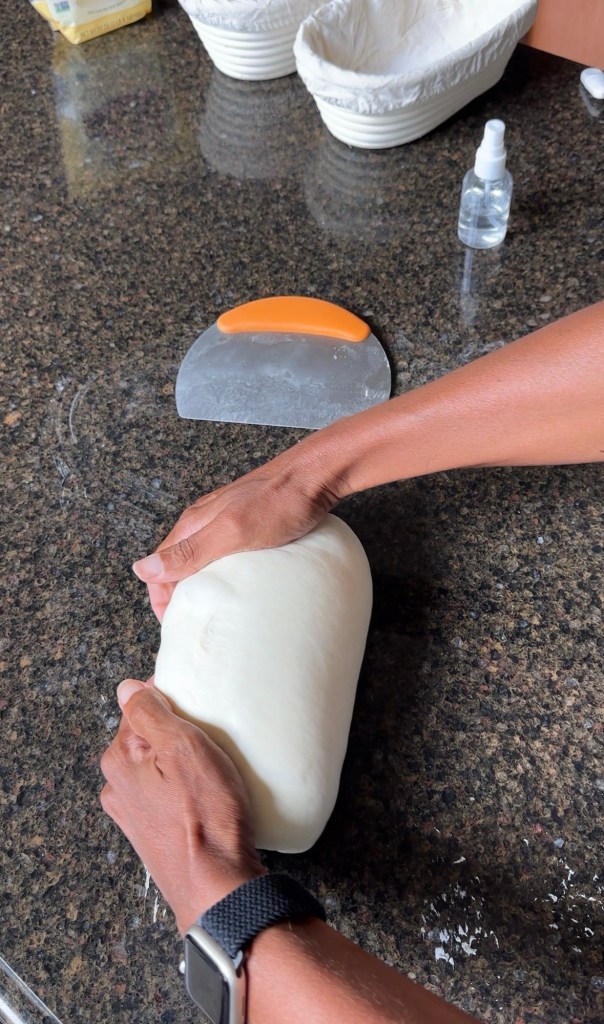
Now your dough should be a little less sticky. Again, wet hands and wet bench scraper you are going to swiftly flip the dough over. Now we have the inside of the loaf up again. This time you are going to stretch the dough into a rectangle about 6×9 inches. Then fold the top section down. Then grab both side and press them to the middle. Then grab the remaining dough and stitch one side then the other all the way down. The front the skinny point at the bottom, roll it up into a log pinching the side together. Again, use the surface tension of the counter and pull the log towards you. If you are making a round loaf turn the dough as you pull it towards you. Dust the loaf with rice flour and use the bench scraper to flip the dough over and lay it in the banneton with the seam side up. Repeat with second loaf.

Once both loaves are in the banneton wait 10 minutes and then stitch the dough. For this you want dry hands. You are going to grab both side of the dough at once and crisscross them repeating across the loaf. This is helping seal the loaf shut and creating more surface tension. With a round loaf you pull the dough to the center.


Cover and refrigerate at least 2 hours up to 18 hours. If you only refrigerate 2-4 hours the dough will just be harder to score, but you can still make great bread. I prefer to refrigerate overnight if i have the time.
When you are ready to bake, you are going to put your dutch ovens in the oven and preheat it to 425° If you only have one no worries, you can bake one right after the other. Preheat with the dutch oven in the oven at least 30 minutes. You want the bread to be able to start to expand right away.
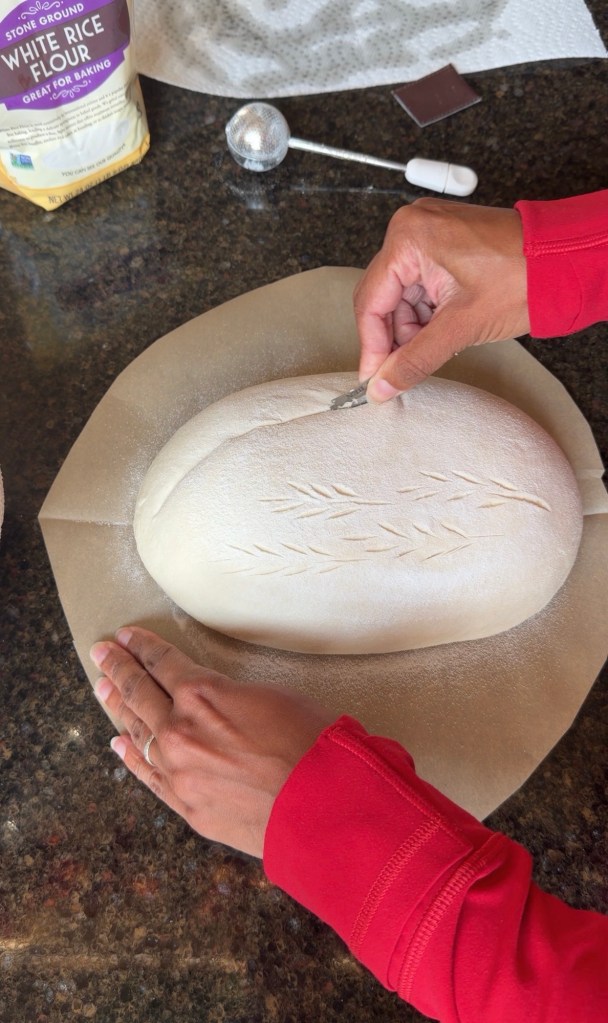
Cut two pieces of parchment paper. You need to use this, so the bread doesn’t stick to the dutch oven. Flip the dough over onto the parchments paper and dust with rice flour. Now you can make decorative scoring. I usually do a wheat stalk. For your expansion score it needs to be about 1/4-1/2 inch deep, go back under the edge of it to emphasize the score. This will allow for steam to escape and gives the dough a place to expand so it doesn’t split.

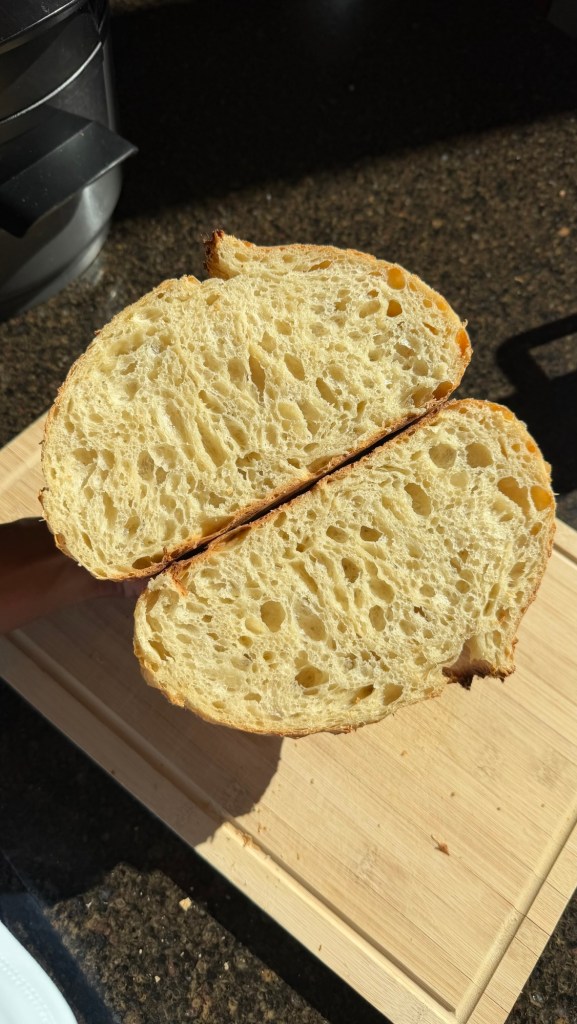
Bake with the lid on for 30 minutes. Then remove the lid and bake another 15 minutes. Let the bread cool at least 1 hour before slicing into it. I know this part is hard, but you risk the bread appearing gummy if you cut it early. It’s worth the wait, I promise!
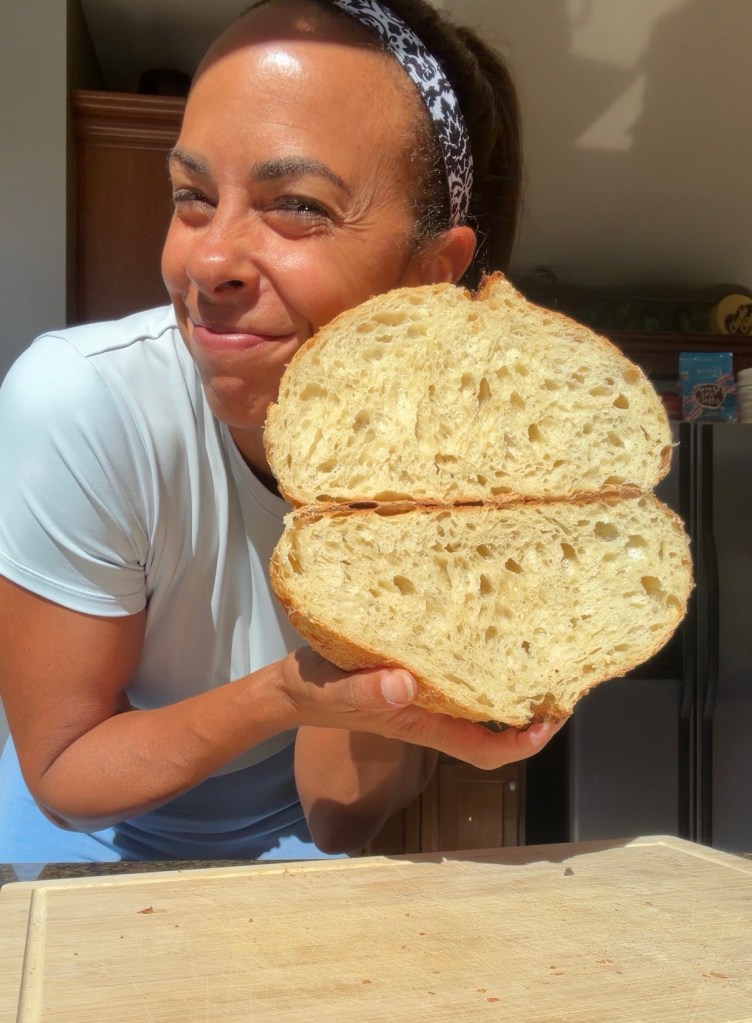
I hope this recipe helps you on your sourdough journey. If you have any questions please ask. Sourdough is my favorite topic and I love analyzing it.
If you make this recipe be sure to tag me on instagram.
- Introducing Bread & Better by sweetandspicymacrosIntroducing Bread & Better by sweetandspicymacros. It’s time to start making bread, better.
- Pumpkin and toasted pecan cinnamon swirl soft sandwich sourdough loafThis recipe was an absolute labor of love. It actually took me five attempts to perfect it. The first attempt didn’t have enough pumpkin flavor, so I decided to add a whole lot of cinnamon to the second attempt. Well, all that cinnamon backfired and caused the dough to have trouble fermenting. Then I tried… Read more: Pumpkin and toasted pecan cinnamon swirl soft sandwich sourdough loaf
- Pesto and Parmesan Artisan SourdoughI promise you’re not going to want to make this recipe if you are trying to cut carbs!
- My First Cookbook Is HereOne thing that has not changed is my love for baking. I still make it my mission to create low calorie, high protein meals and treats.
- How much protein should you be eating?Why in the world does everyone talk about protein so much? What does it mean for me?

Leave a comment